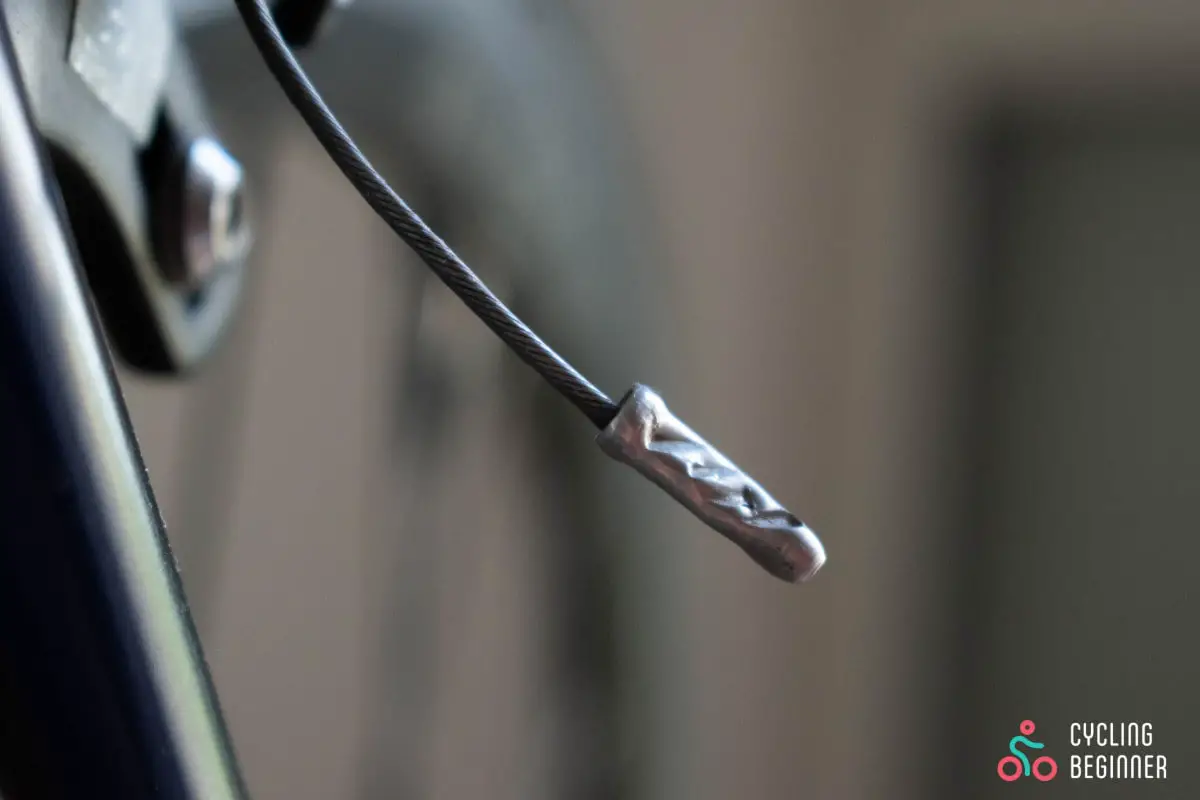
Cable caps, cable ends or cable tips – whatever you call them, you’ve probably wondered how important they really are.
Cable end caps are important because they prevent the cable from fraying at the end. This way, the cable’s lifetime is extended and it can be used multiple times. Cable end caps also prevent scratches on the cyclist’s legs that can be caused by a frayed cable.
Although there are ways to avoid using cable end caps, their use is sensible. For just a few cents, you extend cable’s lifetime. But if you really don’t want to use them, there are other ways you can prevent cable fraying.
If you are looking for a quality cable cutter for installing cable end caps, then look no further than Park Tool Cable Cutter. And if you want to spice up your bike with colorful cable end caps can find them here.
Why should you use cable end caps?
Cable end caps are one of those bike parts that, at first glance, seem to have no major function and you could ride normally without it.
Similar to valve caps or housing end caps, the importance of which I have already discussed in one of the previous blogs.
Unlike valve caps, cable end caps have a rather important function.
Cable end caps ensure that the cable does not start to fray at the end. If the cable frays too much, it will start to lose grip under the screw and over time the cable will no longer be as taut as it should be, and this affects braking or shifting.
If the cable frays too much, it becomes unusable and needs to be replaced.
Although a new cable is not expensive and the replacement is quite simple, it is still more expensive and complex than the installation of a cable end cap.
By installing a cable end cap, you ensure that the cable stays braided at all times. This prolongs its lifespan, while also allowing the cable to be reused.
Using a cable end cap allows the cable to be reused.
Some cyclists are afraid that by installing a cable end cap they would not be able to reuse the cable. Nonsense!
The fact is that it is the cable end caps that allow the cable to be reused as the cable is not ruined.
You can cut the cable right next to the cable end cap and thus shorten it by just an inch. If you did not shorten the cable too much during the initial installation, you can reuse it several times.
However, I suggest frequent replacement of the cable, as this is the only way to keep the brakes and derailleur working smoothly.
What can happen if you don’t use cable end caps?
Aesthetics, lack of cable end caps at home or something else. There are many reasons why cyclists decide to leave the end of the cable “bare”.
Although this is not the biggest mistake a cyclist can make, it is still not recommended.
The lack of a cable end cap leads to higher costs, more frequent bike servicing and even injuries. Yes, all this rests on the shoulders of a small piece of metal.
The most common consequence of not having a cable end cap is cable fraying.
You have probably seen a completely frayed cable, usually all the way to the screw, which still somehow holds the cable together. But the screw eventually loosens, at which point the cable threads slip out of its grip one by one and the cable is no longer as taut as it should be.

A slack cable no longer transmits the force that we create when squeezing the brake or shift lever. Consequently, braking becomes worse or the shifting does not work as it should and eventually no longer allows you to change gear
As a result, more frequent service or manual cable changes are necessary. Thus, you unnecessarily waste time and money instead of enjoying the ride.
A frayed cable also brings another danger.
Thin threads are extremely sharp and can easily leave a bloody scratch on your body. Cyclists often unknowingly brush against brake or gear cables and if it is not protected, be prepared for bloody scratches.
How do you install cable end caps?
Installing cable end caps is probably the simplest task on a bike.
For successful cable end cap installation, you only need two things:
After proper cable installation, a relatively long part of the cable remains behind the bolt. It clearly needs to be shortened, as a dangling cable presents considerable danger while riding.
Cut the cable so that approximately 2.5 inches (6 cm) of cable remains behind the bolt. About half an inch will be covered by the cable end cap and the rest is a reserve that allows the cable to be shortened later.
Before cutting the cable, measure the final length twice and then cut the cable boldly. Here, the quality of the cutters is important. Cheap ones can fry the cable when cutting, so buy quality pliers that make a clean cut.
PRO TIP: If you have dull cutters at home, you can soak the cable in super glue, let it dry and then cut the cable. The glue will prevent the cable from frying and the cut will be much nicer.
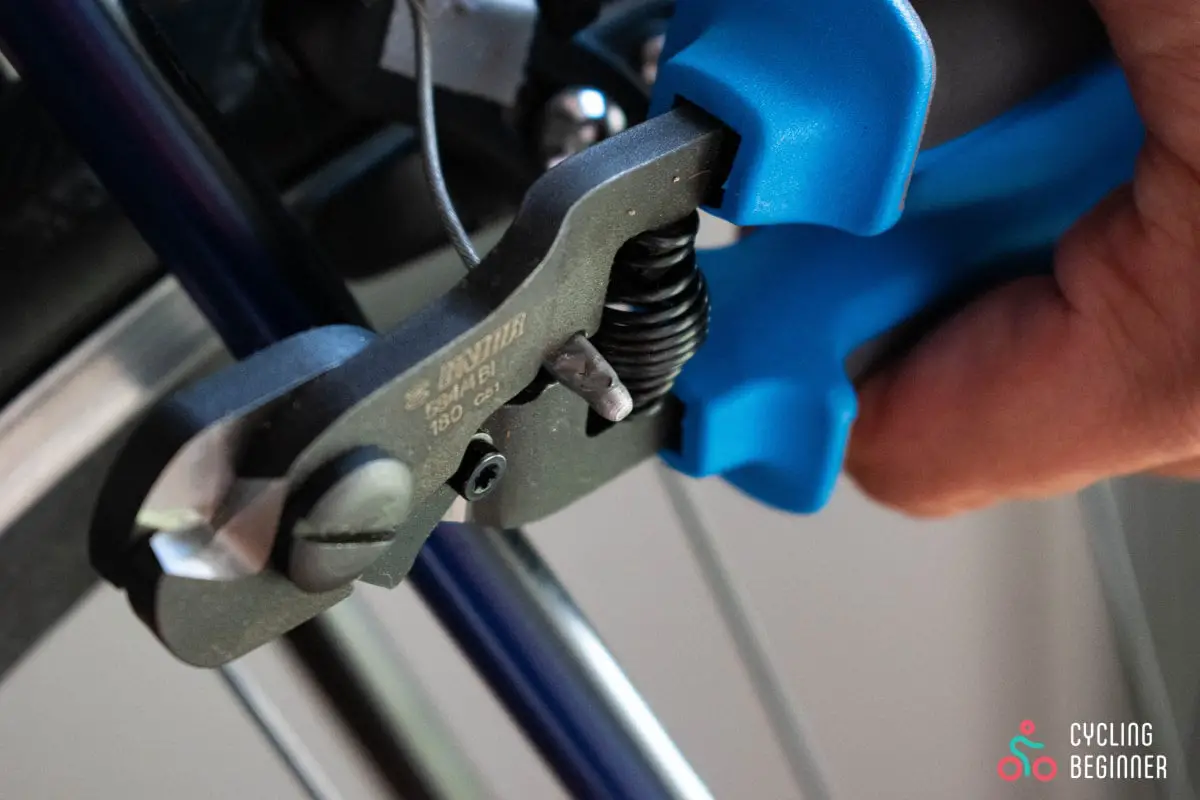
Place the cable end caps on the end of the cable, then squeeze it with the inner part of the cutters, where indentations are made just for this task. It requires a very strong squeeze that deforms the cable end cap and thus locks it to the cable.
Be careful not to let the cable end cap slide down or even off the cable during squeezing. It can quickly happen that the cable end cap slides off, meaning it’s not properly attached to the cable and you need to repeat the installation process with a new cable end cap.
Can you reuse cable end caps?
The cable end cap is probably the cheapest part of a bicycle. If you buy it in a pack, you can get it for around 10 cents.
But I understand that you want to save money wherever you can.
The good news is that you can reuse the cable end cap, but some caution is required when you remove it.
The cable end cap is usually squeezed in one direction from both sides. If you want to reuse it, you need to squeeze it from the other direction, so that the unsqueezed part is caught between the cutters.
With a gentle squeeze, the cable end cap will start to regain its round shape again, which will cause it to no longer stick to the cable. When you squeeze it hard enough, it will fall off the cable and be available for reuse.

Place the obtained cable end cap on a new cable and squeeze it again from the side it was initially squeezed. So from the other side as you were squeezing for its removal from the cable.
In this way, the cable end cap will maintain its strength and will adequately crimp the new cable. Besides, it will also be easier for you to squeeze in this direction.
Alternatives to cable end caps
A thousand people, a thousand ideas. I am aware that some are not enthusiastic about cable end caps because they supposedly spoil the bike’s look.
If you are among them, I am pleased to announce that there are a few tricks to prevent cable fraying even without using cable end caps.
Super glue
Probably the most elegant and aesthetically effective solution is super glue. You can dip the end of the cable in super glue and let it dry. This glues together the individual threads that make up the cable and prevents it from fraying.
If you are very careful when dipping the cable in super glue, you can do it so effectively that the glue is not noticeable at all after drying.
Soldering the cable
A more technically demanding method is soldering the cable. As the name implies, we fight against its fraying by soldering the end of the cable.
This method requires more tools and knowledge. Although soldering is not that difficult, it is still more difficult than gluing with super glue.
This method soldered the threads of the cable together, and when the metal hardens, frying is virtually impossible.
The good side of this method is its effectiveness, as it completely prevents fraying. The downside, however, is its complexity and the fact that the consequences of soldering are visible on the cable.
Heat shrink tube
An elegant solution is also a heat shrink tube. Install this on the end of the cable and then heat it with a heat gun.
The heat shrink tube will shrink when exposed to heat and will wrap the cable, preventing it from fraying.
Nipple
No, not that one! The one you find on your wheels.
If you do not have a cable end cap at hand but still want to prevent cable fraying, you can attach a nipple to the end of the cable and squeeze it, as you would do with a cable end cap.
I’m of the opinion that the average cycling enthusiast is more likely to have a cable end cap rolling around at home than a nipple, but maybe your situation is different from mine.
Electrical tape
If you don’t have any of the above tools handy, you can also use electrical tape to prevent cable fraying.
Wrap it tightly around the end of the cable several times and stick it firmly to the cable to prevent it from unwinding while riding.
This is the least effective method, which in most cases only represents a temporary solution. But it will help you prevent fraying until you buy a cable end cap.
